
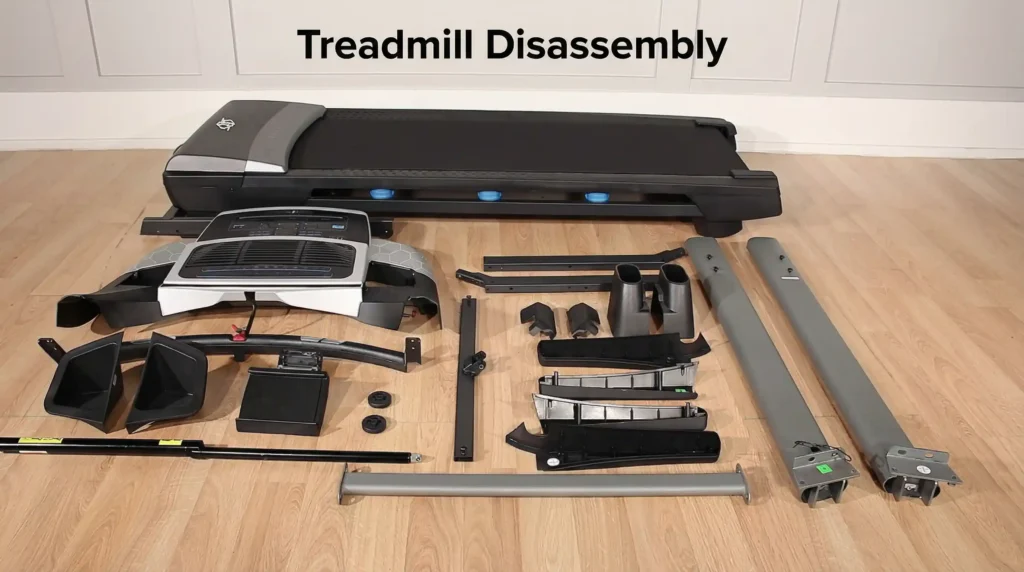
How to disassemble a treadmill might seem like a daunting task when you're staring at your 300-pound fitness machine, but I'm here to walk you through it. Last year, I helped three friends relocate their home gyms, and every single one of them had the same concern: how to dismantle a treadmill. After years of testing fitness equipment and helping clients solve these exact challenges, I've learned that proper disassembly is mostly about understanding your specific machine and taking the right precautions to avoid damage or injury.

Moving a treadmill without professional help can save you anywhere from $70 to $500, but only if you do it correctly. Throughout this guide, I'll share the exact steps on how to dismantle different treadmill brands, the essential tools you'll need, and safety considerations that most people overlook. If you're relocating to a new home, creating more space in your current one, or preparing for treadmill maintenance or treadmill repair, you'll find everything you need to successfully take apart a treadmill without damaging your machine or hurting yourself.
How to Disassemble a Treadmill: Essential Tools and Preparation
Before you even touch a single bolt, gathering the right tools makes the entire disassembly process smoother and safer. I learned this the hard way when I attempted to take apart my first NordicTrack using only a basic screwdriver - since it took twice as long and I nearly stripped several screws in the process. Check the owner's manual first: NordicTrack and ProForm manuals list the included hex keys, an adjustable wrench, and a Phillips screwdriver, and ProForm warns against power tools because they can damage parts.
Essential tools you'll need:
- Phillips head screwdriver (multiple sizes)
- Hex wrench set (especially 5mm, 6mm, and 8mm)
- Adjustable wrench
- Socket wrench with various socket sizes
- Zip ties or tape for securing cables
- Small plastic bags for organizing screws and bolts
- Marker for labeling components
- Moving blankets or bubble wrap
- Hand truck or dolly (for transport)
The specific tools required vary by brand and model. For instance, when disassembling a NordicTrack treadmill, you'll primarily need hex wrenches and Phillips head screwdrivers. ProForm treadmills often require an 8mm hex wrench for motor bolts, while the Sole F80 uses a combination of M5 Allen wrench and Phillips head tools.
Knowing your brand inside and out matters here. If this move has you reconsidering whether to keep your current machine or upgrade to something better suited for your space, our complete home treadmill buying guide and roundup breaks down which models hold up best over years of use and what separates genuinely durable machines from ones that just look the part on a spec sheet.
One critical step that many people skip is downloading your treadmill's owner's manual. Even if you're confident about the disassembly process, having those diagrams available helps you identify exactly which bolts secure which components. Most manufacturers offer free PDF downloads on their websites, and this documentation proves invaluable during reassembly.
Create a dedicated workspace with adequate lighting and enough room to lay out components. I recommend at least a 10-foot by 10-foot area around the treadmill. Clear pathways to doorways and consider measuring your doorframes ahead of time. Many people discover mid-move that their disassembled console won't fit through a narrow hallway.
Safety First: Critical Precautions Before Dismantling Treadmill
Proper safety measures prevent both personal injury and equipment damage. Research shows that manual material handling tasks involving objects over 200 pounds significantly increase the risk of musculoskeletal injuries (1). Given that most treadmills weigh between 150 and 350 pounds, taking the right precautions isn't optional.
Pre-disassembly safety checklist:
- Unplug the treadmill from the power outlet completely
- Remove and secure the safety key in a labeled bag
- Let the machine sit unplugged for 5-10 minutes to discharge any residual electricity
- Wear closed-toe shoes with a good grip
- Use work gloves to protect your hands from sharp edges
- Recruit at least one helper for lifting heavy components
- Clear the surrounding area of tripping hazards
- Have a first aid kit nearby
The unplugging step deserves special attention. Simply turning off the treadmill isn't enough. You must also disconnect it from the wall outlet entirely. I once worked with someone who forgot this step and got a nasty shock when he touched an exposed wire while removing the console. After unplugging, secure the power cord with zip ties or tape to the frame so it doesn't dangle and create a tripping hazard during the move.
Studies on ergonomic interventions in material handling show that using proper equipment and techniques significantly reduces injury rates among workers handling heavy objects (2). Apply these same principles to treadmill disassembly: never attempt to lift components that exceed your comfortable lifting capacity, and always use proper lifting form with bent knees and a straight back.
Step-by-Step: How to Take Apart a Treadmill Console
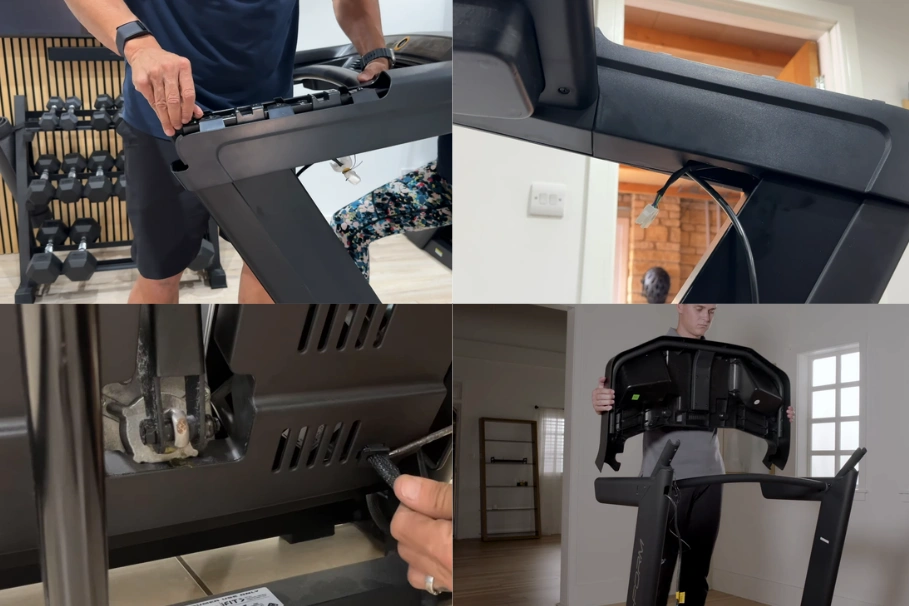
The console represents the electronic brain of your treadmill and requires careful handling. Damage to this component can cost hundreds of dollars to replace, so proceed methodically.
Start by locating the screws that connect the console to the upright frame. On most models, you'll find 2-4 screws on each side of the console mount. These are typically Phillips head screws, though some manufacturers use hex bolts. Remove these screws carefully and place them in a labeled bag.
Before lifting the console away, you need to disconnect the wiring. This is where many people make mistakes. The wiring harnesses connecting the console to the treadmill's motor and controls aren't designed for force. Look for small release tabs or buttons on the connectors, as pressing these allows the connectors to separate smoothly without damage.
On ProForm treadmills, the console connector typically features a small notch button that must be pressed to release the connection. NordicTrack models often use similar snap connectors with release mechanisms. Never pull on the wires themselves; always grip the plastic connector housing when disconnecting.
Once the wiring is disconnected, carefully route the cables out from inside the upright posts. Some models require you to gently pull the wiring through channels in the frame. Take photos with your phone at each step. These visual references make reassembly infinitely easier.
Wrap the console in a moving blanket or bubble wrap, paying extra attention to touchscreen displays. The larger the screen, the higher the replacement cost if something goes wrong in transit. Premium incline models tend to carry the most console value, so if an upgrade is on your radar after the move and incline capability is a priority, our top incline treadmill review is the right place to start comparing options.
Removing Handrails and Side Rails From the Frame
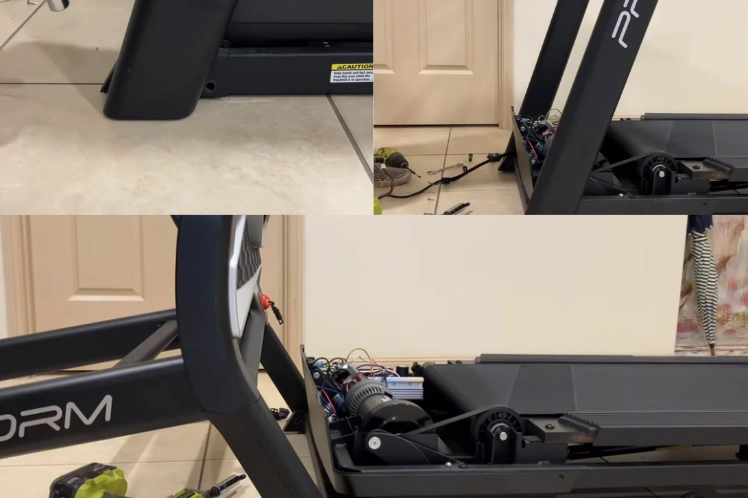
The handrails provide structural support and house much of the treadmill's wiring, which makes their removal a delicate process. On most treadmills, the handrails connect to the base through 4-8 bolts at the bottom of each upright post.
For standard treadmill models, you'll find these connection bolts at the base where the uprights meet the deck. They are not the same size on every brand: the NordicTrack Commercial 1750 manual lists 3/8" screws with star washers at each upright, while the Sole F80 uses 5/16" button head socket bolts. Match the tool to the fastener, and check for any wiring connections before you remove them.
When you disassemble a NordicTrack treadmill, the process involves removing the upright covers first. These covers typically pop off with a firm pull toward you from the top. Once removed, you'll see the internal wiring that needs to be disconnected before you can slide the entire upright assembly off the frame.
To disassemble a Sole F80 treadmill, start with the console mast covers, using the M5 Allen wrench and Phillips head combination tool that ships with the machine. Sole's manual shows four socket bolts on each side bar, and the upright tubes attach to the frame base with eight 5/16" x 1/2" button head bolts.
Key steps for removing uprights:
- Remove any decorative covers or shrouds covering the base connection points
- Disconnect all wiring running through the uprights (take photos first)
- Loosen the mounting bolts one turn at a time, alternating between bolts
- Support the upright with one hand while removing the final bolts
- Carefully slide or lift the upright assembly away from the base
- Wrap the removed uprights in protective material immediately
One technique I've found helpful: before fully removing the uprights, tip the treadmill slightly onto its side (with help from another person). This positioning makes it much easier to access the bottom mounting bolts without straining your back.
Pro Tip: Before removing uprights or handrails, place a small piece of tape marked “L” (left) and “R” (right) near the base connection.
Many treadmills look symmetrical but aren’t perfectly mirrored internally: wire routing holes, grounding points, or internal brackets may differ slightly. Reversing uprights during reassembly can cause pinched cables or alignment problems that are frustrating to diagnose later.
This 30-second step can save 30 minutes during reassembly.
How to Disassemble a ProForm Treadmill for Moving
The motor and deck assembly represents the heaviest component of any treadmill. To take apart a ProForm treadmill to move it, you only remove the console and the uprights; the heavy motor and deck stay together, which is why this step needs care with weight and wiring.
For a move, you do not need to take out the motor. ProForm's manual lists the included hex keys, an adjustable wrench, and a Phillips screwdriver, and warns against power tools. Work in reverse of the assembly order: support the console, disconnect its wiring, remove the uprights, and keep the base and deck together.
Leave the motor, motor cover, and belt in place. Removing them adds wiring and alignment work during reassembly without making the base meaningfully easier to carry, so I would save that job for maintenance rather than a move.
The walking deck and base stay together for a normal move. They carry the belt, rollers, motor, and most of the treadmill's weight, so plan to move them as one unit on a dolly with a helper.
To disassemble a ProForm PRO 2000 treadmill, follow the same broad order as the ProForm 5000: fold and lock the deck before removing the final upright or console hardware. This folded position makes it easier to reach certain mounting bolts and reduces the footprint during transport. Folding models such as the ProForm Carbon foldable treadmill use a similar moving approach, but always check the model manual before removing hardware.
Motor and deck removal safety tips:
- Never attempt to lift the deck assembly alone
- Use a furniture dolly or hand truck rated for at least 400 pounds
- Disconnect all wiring before attempting to move components
- Keep the belt attached to the deck during transport when possible
- Secure the deck with ratchet straps if transporting in a vehicle
When my neighbor had a problem with how to disassemble his ProForm 5000 treadmill last fall, we found that keeping the belt on the deck actually provided additional structural integrity during the move. Removing the belt isn't necessary unless you're planning on servicing specific components.
How to Disassemble NordicTrack Treadmill Models
How to take apart a NordicTrack treadmill for moving comes down to the same order on every model: console, wiring, then uprights. NordicTrack treadmills share many common design elements across their model range, but specific models like the C900, 1750, and Commercial series have unique considerations.
Start with the console. On the NordicTrack Commercial 1750, the manual attaches the console with four 5/16" x 2" screws and star washers, so support the console while a helper removes them, then disconnect the upright wire from the console wire (the connectors slide apart) and the fan wires.
The uprights come off next. On the 1750, each upright is fastened to the base with two 3/8" x 2 3/4" screws, two 3/8" x 1 1/4" screws, and four star washers, so keep each side's hardware in its own labeled bag. Before removing these screws, make certain every wire running through the uprights is disconnected.
On the 1750, the wiring runs only through the right upright; the manual notes there are no wires on the left side. I recommend having one person hold the right upright while another guides the upright wire out through its channel.
If you need NordicTrack treadmill disassembly instructions, use the assembly steps in your manual in reverse. On the NordicTrack Commercial 1750, the order is console first, then the uprights, while the base, deck, and motor stay together. Look up your exact model number on the frame label, since hardware sizes change between model years.
How to disassemble a NordicTrack C900 treadmill?
To dismantle a NordicTrack treadmill like the C900, follow the same order: console first, then the upright bolts, with the wiring disconnected before anything is lifted. Hardware sizes vary by model year, so match them against the manual for your model number before you start.
A unique consideration for NordicTrack models: most fold. Fold the deck and engage the storage latch before moving the base, and never carry a folding treadmill with the latch released, since the deck can drop open unexpectedly.
Disassemble Treadmill for Moving: Special Brand Considerations
Different manufacturers use varying assembly methods, and understanding these differences helps you avoid common pitfalls.
How to disassemble a Bowflex treadmill
Bowflex treadmills often feature more integrated designs with proprietary connection systems. The console on Bowflex models typically uses unique mounting brackets that require removing several layers of plastic shrouds before you can access the mounting hardware.
When working with a Bowflex, pay special attention to the belt tension system. Many Bowflex models use a rear roller adjustment mechanism that needs to be set to its loosest position before disassembly. This reduces stress on the belt during transport.
How to disassemble a Sole F80 treadmill
The Sole F80 has earned a reputation for durability, which translates to robust mounting systems. You'll need the included M5 Allen wrench and Phillips head combination tool for the console mast covers, which come off with four socket bolts on each side bar.
To disassemble a Sole treadmill for moving, remove the left and right side caps on the F80 before you reach the main upright mounting bolts. This adds an extra step but actually makes the final disassembly cleaner since you can see all connection points clearly.
How to disassemble a Peloton treadmill
Peloton treadmills, with their premium construction and large touchscreens, demand extra care during disassembly. The console represents a significant investment and requires special padding during transport.
The Peloton Tread features a unique base-to-upright connection system that uses security screws in addition to standard hex bolts. You'll need a security bit set to remove these specialized fasteners. The manufacturer designed this system to discourage unauthorized service, but it's accessible with the right tools.
| Brand | Primary Tools Needed | Unique Considerations | Estimated Disassembly Time |
|---|---|---|---|
| NordicTrack | Included hex keys, adjustable wrench, Phillips screwdriver | Wires run through the right upright only (Commercial 1750); fold and latch the deck | 45-90 minutes |
| ProForm | Included hex keys, adjustable wrench, Phillips screwdriver (no power tools) | Motor and deck stay attached for a move | 60-90 minutes |
| Sole F80 | Included M5 Allen and Phillips combination tool | Console mast covers come off before the upright bolts | 60-120 minutes |
| Bowflex | Hex wrench set, Phillips screwdriver, socket wrench | Proprietary mounting brackets, belt tension system | 45-75 minutes |
| Peloton | Security bit set, hex wrenches, Phillips screwdriver | Premium touchscreen protection, security fasteners | 60-90 minutes |
Treadmill Repair and Service: When to Disassemble Versus When to Call Professionals
Sometimes disassembly serves purposes beyond moving. Treadmill repair often requires partial disassembly to access internal components like the motor, belt, or control board.
If you're planning to service a treadmill rather than move it, you might not need full disassembly. Many common repairs, including belt replacement, lubrication, and roller adjustments, only require removing the motor cover and possibly the side rails.
However, major repairs like motor replacement, control board fixes, or frame issues do require more extensive disassembly. Studies show that proper training in manual material handling techniques significantly reduces injury risk during these tasks (3). If you lack experience with treadmill repair, consider hiring a professional technician for complex issues.
Professional treadmill movers typically charge between $70 and $500, depending on the complexity of the move, distance, and whether assembly/disassembly services are included. When you factor in the risk of personal injury or equipment damage from improper handling, professional services often represent good value for complicated situations.
Research on manual material handling shows that equipment weighing over 50 pounds, handled more than 33% of the time, significantly increases injury risk without proper technique (2). Treadmills fall well above this weight threshold, which is why proper form and assistance are non-negotiable.
Can You Take Apart a Treadmill to Move It? Folding Versus Full Disassembly
Not every treadmill move requires complete disassembly. Many modern treadmills feature folding mechanisms that allow you to reduce the footprint without breaking the machine down into individual components.
If you are wondering how to disassemble a folding treadmill, often you do not need to: folding treadmills work well for moves within the same building or to a ground-floor location. The folded position typically reduces length by 2-3 feet, which can make the difference between fitting through a doorway or needing to disassemble further.
However, can you take apart a treadmill to move it up stairs? In most cases, yes, but you'll need to disassemble beyond just folding. Stairs present unique challenges because the weight distribution of even a folded treadmill becomes difficult to control on an incline.
For stair navigation, I recommend at a minimum removing the console and uprights. This reduces the total weight of the base unit by 30-50 pounds and significantly improves your ability to maneuver around tight corners and landings.
Situations requiring full disassembly:
- Moving up or down stairs
- Navigating through narrow doorways (less than 32 inches wide)
- Transporting in a standard vehicle rather than a moving truck
- Long-distance moves where you need maximum space efficiency
- Storage in a confined space
Situations where folding may suffice:
- Same-floor relocation
- Moving through standard doorways (36 inches or wider)
- Short-distance moves in a moving truck
- Temporary storage in a garage or basement with adequate space
When deciding between folding and full disassembly for moving, measure your pathways first. Subtract 2-3 inches from the doorway width to account for safe clearance. Compare this to your folded treadmill dimensions to determine if full disassembly is necessary.
How to Move a Treadmill Through a Doorway
Measure the doorway and the treadmill's folded width first. If the base clears the frame, fold and latch the deck, tilt the unit onto its rear wheels, and roll it through straight rather than at an angle. If it does not clear, remove the console and uprights first. I would always protect the door frame with a moving blanket. For future small-space setups, compact under desk treadmills are easier to move through tight doorways.
Worth noting: not all folding treadmills are created equal when it comes to real-world relocation. Some feature hydraulic-assist hinges and lighter frames that make the fold-and-move process genuinely practical, while budget folding models can feel just as unwieldy as non-folding ones. If you are in the market for a replacement after this move, our complete folding treadmill review covers the models that actually deliver on the portability promise.
Manual treadmills are usually simpler to move because there is no console wiring or drive motor to disconnect. I would still check the frame hinges, handlebar fasteners, and deck lock before lifting, because lighter frames can bend if one side is unsupported.
Organizing Components During Disassemble Treadmill for Moving
Proper organization during disassembly makes reassembly dramatically easier. I learned this lesson after spending three hours trying to figure out which screws belonged where during my first treadmill reassembly.
Effective organization system:
- Use gallon-size plastic bags for each major component
- Label each bag with a permanent marker (example: "Console Mounting Screws")
- Group related parts together (all uprights components in one area)
- Take photos at each disassembly stage
- Number your bags to match your disassembly sequence
- Keep all bags together in a larger container or box
Color-coding can add another layer of organization. I use red bags for electrical components, blue bags for frame hardware, and clear bags for miscellaneous parts. This system lets me quickly locate specific components during reassembly without reading every label.
Your smartphone camera is one of the most valuable tools during disassembly. Before removing any component, take a photo showing how it connects, which wires attach where, and the relative position of parts. These reference photos prove invaluable weeks or months later when you're trying to remember how everything fits back together.
Create a simple diagram showing your disassembly order. Number each major step and note which bag contains the hardware for that step. This roadmap helps you reverse the process during reassembly by simply working backward through your numbered steps.
How to Open a ProForm Treadmill and Access Internal Components
If you are wondering how to open a treadmill like a ProForm for maintenance or deeper disassembly, start with the motor cover. Unlike complete disassembly for moving, accessing internal components requires a more surgical approach.
If you are opening the motor cover for maintenance, loosen the screws gradually and keep them organized by location. Check the parts list in your manual for the correct screw count and size.
With the cover removed, you'll see the motor, belt system, and control board. The control board usually mounts on one side of the motor housing with 2-4 small screws. These electronic components are sensitive to static discharge, so ground yourself by touching a metal part of the frame before handling the board.
Belt access on ProForm treadmills doesn't always require full disassembly. You can often adjust or replace the belt by removing just the motor cover and loosening the rear roller bolts. This partial disassembly takes 15-20 minutes versus the 60-90 minutes needed for a complete breakdown.
For deeper access, such as replacing the deck itself or servicing the front roller, you'll need to proceed with full disassembly as outlined in earlier sections. The key difference is whether you need to move the entire machine or simply access specific internal components.
Timeline and Physical Requirements for Treadmill Assembly and Disassembly
Understanding the time commitment helps you plan appropriately. Based on my experience helping multiple people with various treadmill models, here's what to expect:
| Task | Experience Level | Time Required | People Needed |
|---|---|---|---|
| Basic disassembly (folding model) | Beginner | 30-45 minutes | 1-2 people |
| Full disassembly (standard residential) | Intermediate | 60-90 minutes | 2 people |
| Full disassembly (commercial/heavy-duty) | Advanced | 90-150 minutes | 2-3 people |
| Reassembly (any model) | Same as disassembly | Add 30-50% more time | Same as disassembly |
The physical requirements are substantial. Research on ergonomic workplace assessments shows that handling equipment and heavy objects leads to a high incidence of musculoskeletal injuries (4). Taking regular breaks during the disassembly process is important, and attempting to rush through the entire process increases injury risk dramatically.
I recommend working in 20-30 minute sessions with 5-10 minute breaks between. This pacing helps you maintain focus and reduces physical fatigue. During breaks, hydrate and stretch your back, shoulders, and legs.
If you feel any sharp pain, stop immediately. Dull muscle fatigue is normal when handling heavy equipment, but sharp or sudden pain indicates you're either using improper technique or exceeding your safe lifting capacity.
Protecting Your Investment: Packing and Storing Disassembled Components
Once disassembled, proper packing prevents damage during transport or storage. The console deserves the most protection, followed by any electronic components and the uprights.
Console protection steps:
- Wrap in bubble wrap with at least 2 inches of padding on all sides
- Place the wrapped console in a sturdy box
- Fill empty space with packing peanuts or crumpled paper
- Mark the box "FRAGILE - ELECTRONICS - THIS SIDE UP"
- Keep the box in a climate-controlled vehicle or storage area
The deck and frame components need protection from scratches and dings. Moving blankets work well for the base unit, while bubble wrap or foam padding protects the uprights. Secure all padding with packing tape to prevent it from shifting during transport.
Store disassembled components in a dry location.
Humidity can damage electronic components and cause rust on metal parts. If storing for more than a few weeks, consider placing moisture-absorbing packets in boxes containing electronics.
Stack components carefully. Never place heavy items on top of the console or any wrapped electronic components. The base/deck assembly should go on the bottom, with lighter components like uprights and hardware bags on top.
If the treadmill will sit in storage, I would wait to lubricate the belt until reassembly unless your owner's manual says otherwise.
For long-term storage (more than 6 months), I recommend:
Removing the belt from the deck to prevent it from taking a "set"
Applying a thin coat of machine oil to exposed metal parts
Checking on components monthly to ensure no moisture accumulation
Keeping all documentation and hardware bags together in one clearly labeled container
Treadmill Maintenance Tips During Disassembly
Disassembly provides an excellent opportunity to perform treadmill maintenance tasks that are difficult to complete when the machine is fully assembled. With the motor cover removed and components separated, you can thoroughly clean and inspect parts that are normally hidden.
One thing worth bookmarking before you start putting everything back together: a step-by-step treadmill assembly walkthrough covers the full rebuild sequence, including belt tension calibration and console wiring.
- Start with the belt and deck. Wipe down the underside of the belt with a clean, dry cloth to remove any built-up dust or debris. Check the belt for signs of wear, such as excessive fraying, thin spots, or uneven wear patterns, which indicate it may need replacement.
- Inspect the rollers at both ends of the deck. These should spin freely without wobbling or grinding noises. Apply a drop of machine oil to the roller bearings if they seem sticky, but avoid over-lubricating as excess oil attracts dust.
- The motor deserves careful inspection. Look for any signs of burning on the motor or smell for burnt electronics. Check that the motor's cooling fan spins freely and clean any dust from the fan blades with compressed air or a soft brush.
- Electrical connections should be inspected for corrosion or looseness. Tighten any connections that seem loose, and use electrical contact cleaner on any contacts that show signs of corrosion or oxidation.
- Finally, examine all the bolts and screws you removed. Replace any that show signs of stripping or damage. Using damaged hardware during reassembly creates weak points that can fail during future use. Hardware stores carry standard metric and imperial bolts if you need replacements.
Common Mistakes to Avoid When You Disassemble a Treadmill
After helping numerous people with treadmill disassembly, I've seen the same mistakes repeated. Learning from these errors saves you time, money, and potential injury.
Critical mistakes to avoid:
- Forcing stuck bolts instead of applying penetrating oil and letting it sit
- Disconnecting wires without photographing the connections first
- Removing all bolts from one side before the other (creates uneven stress)
- Attempting to lift the deck assembly without adequate help
- Losing track of which screws belong to which components
- Forgetting to secure the safety key before starting
- Trying to remove the console without first disconnecting all wiring
- Rushing through the process instead of working methodically
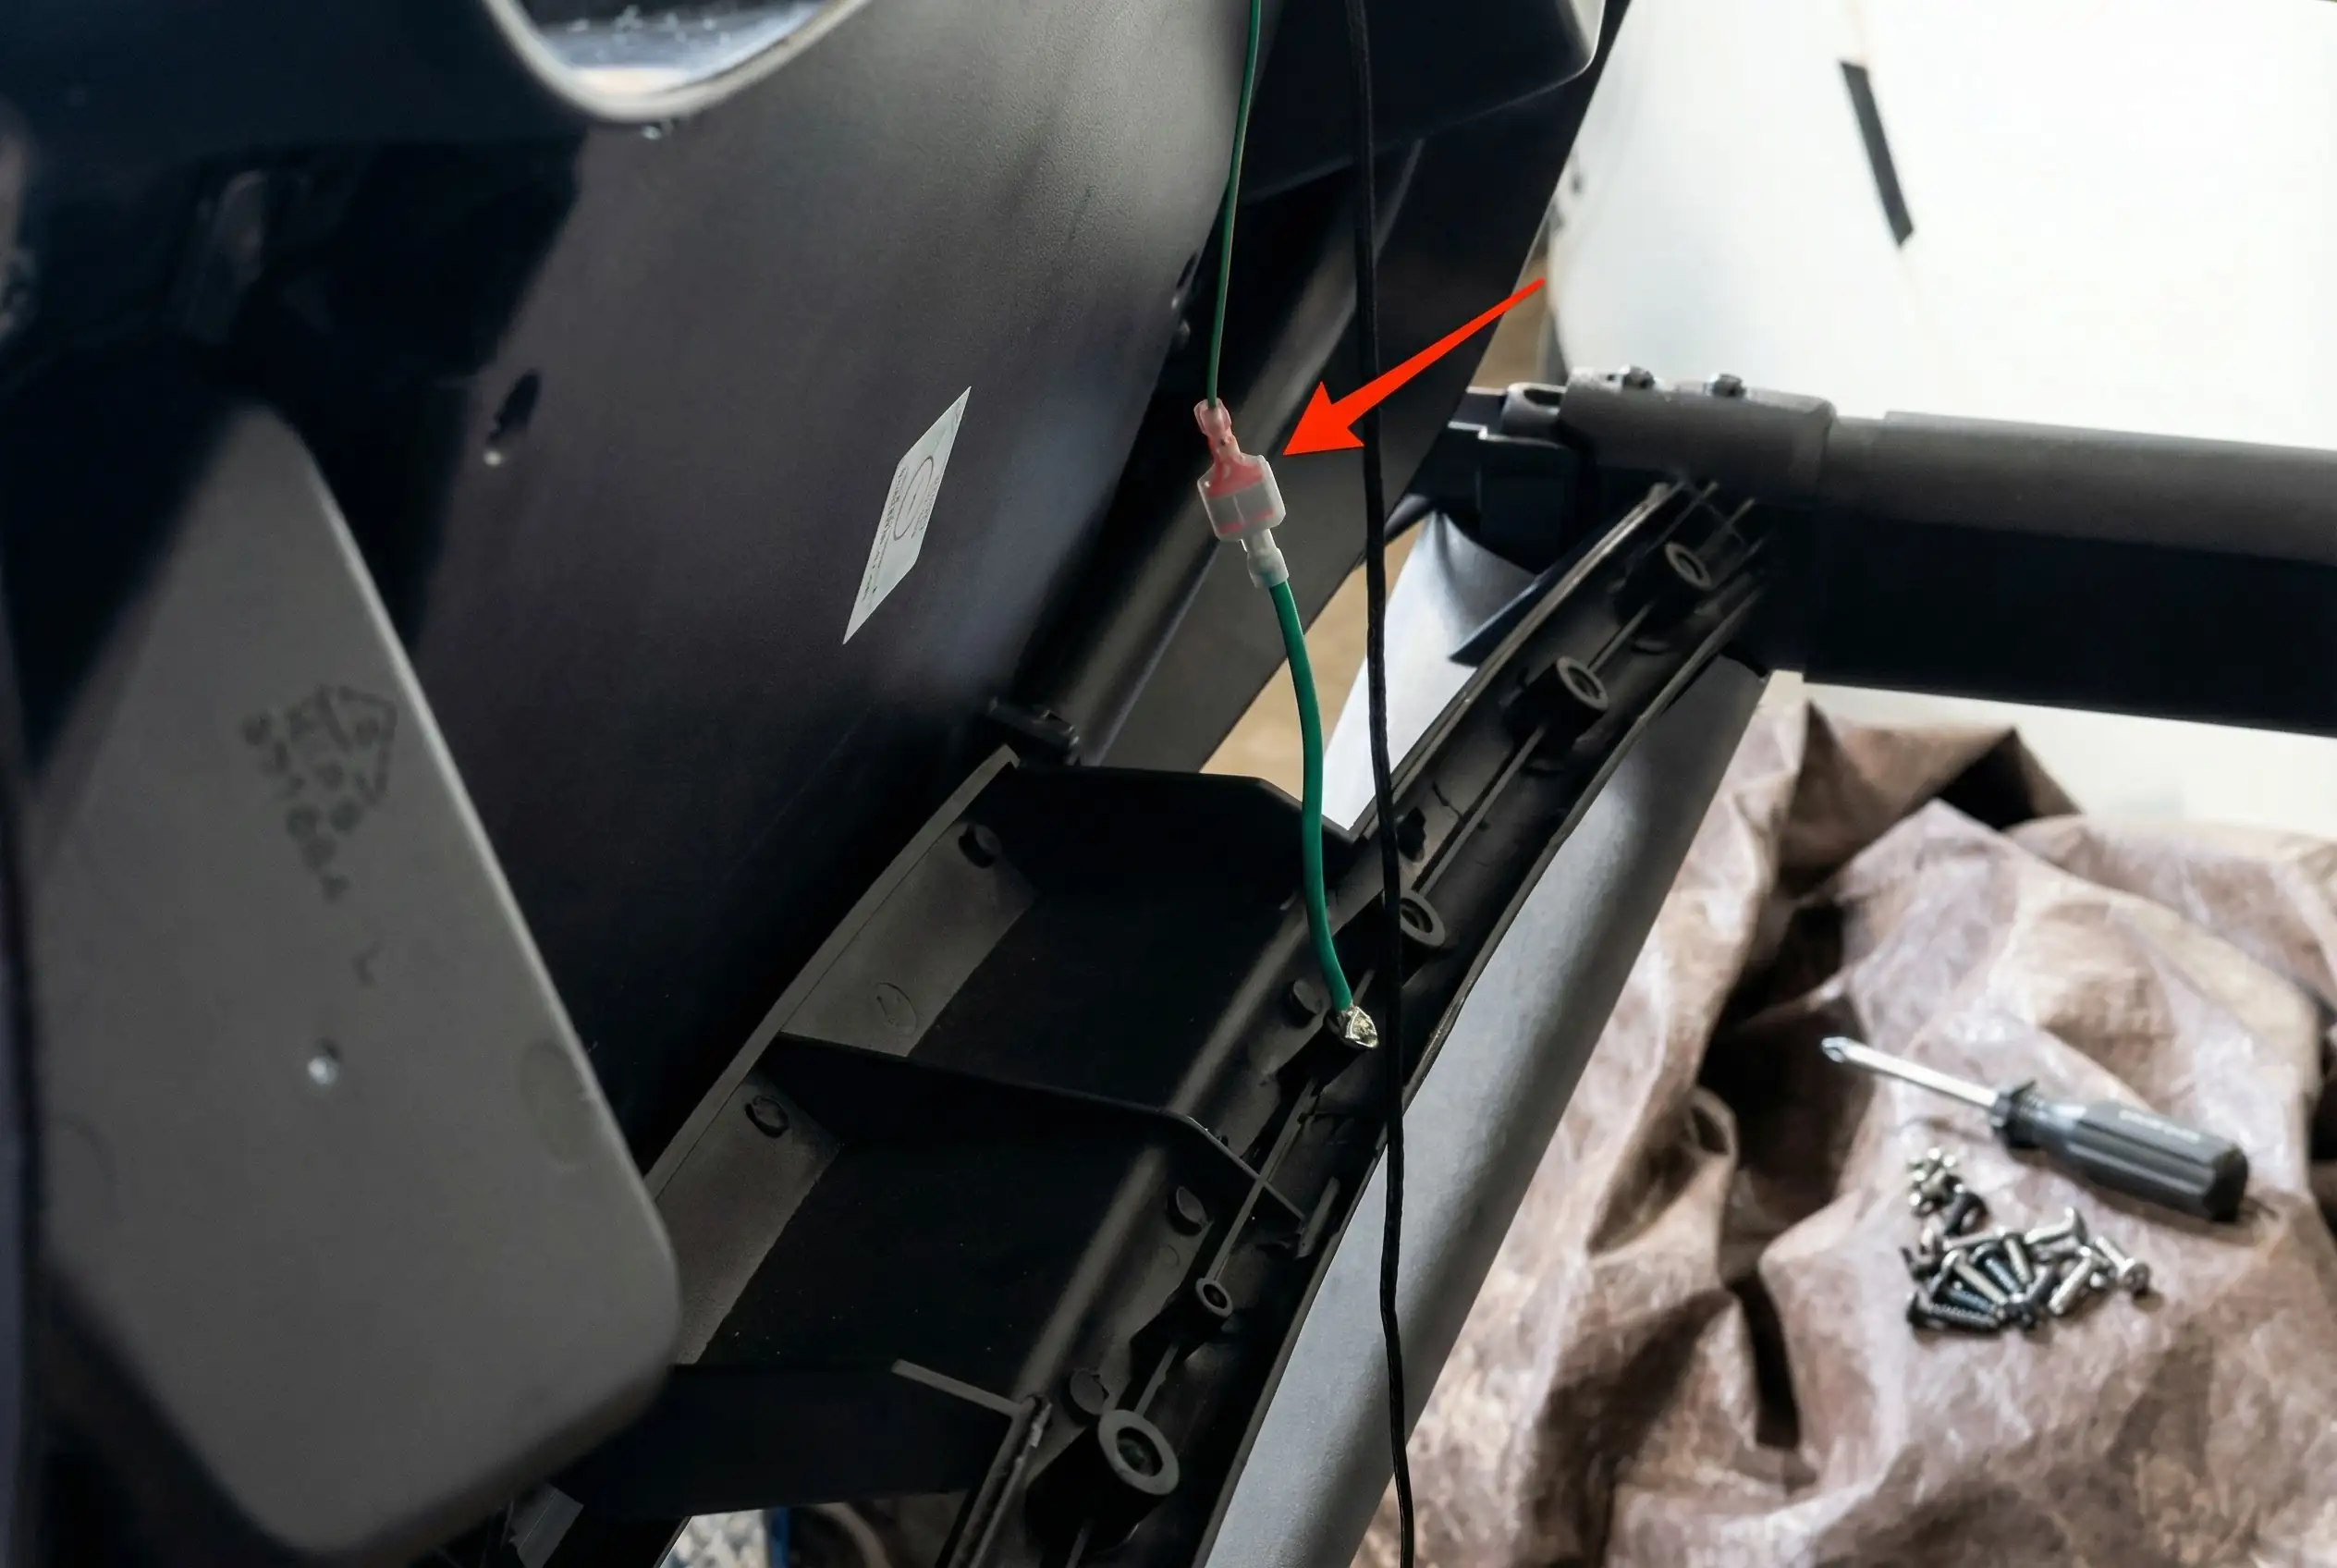
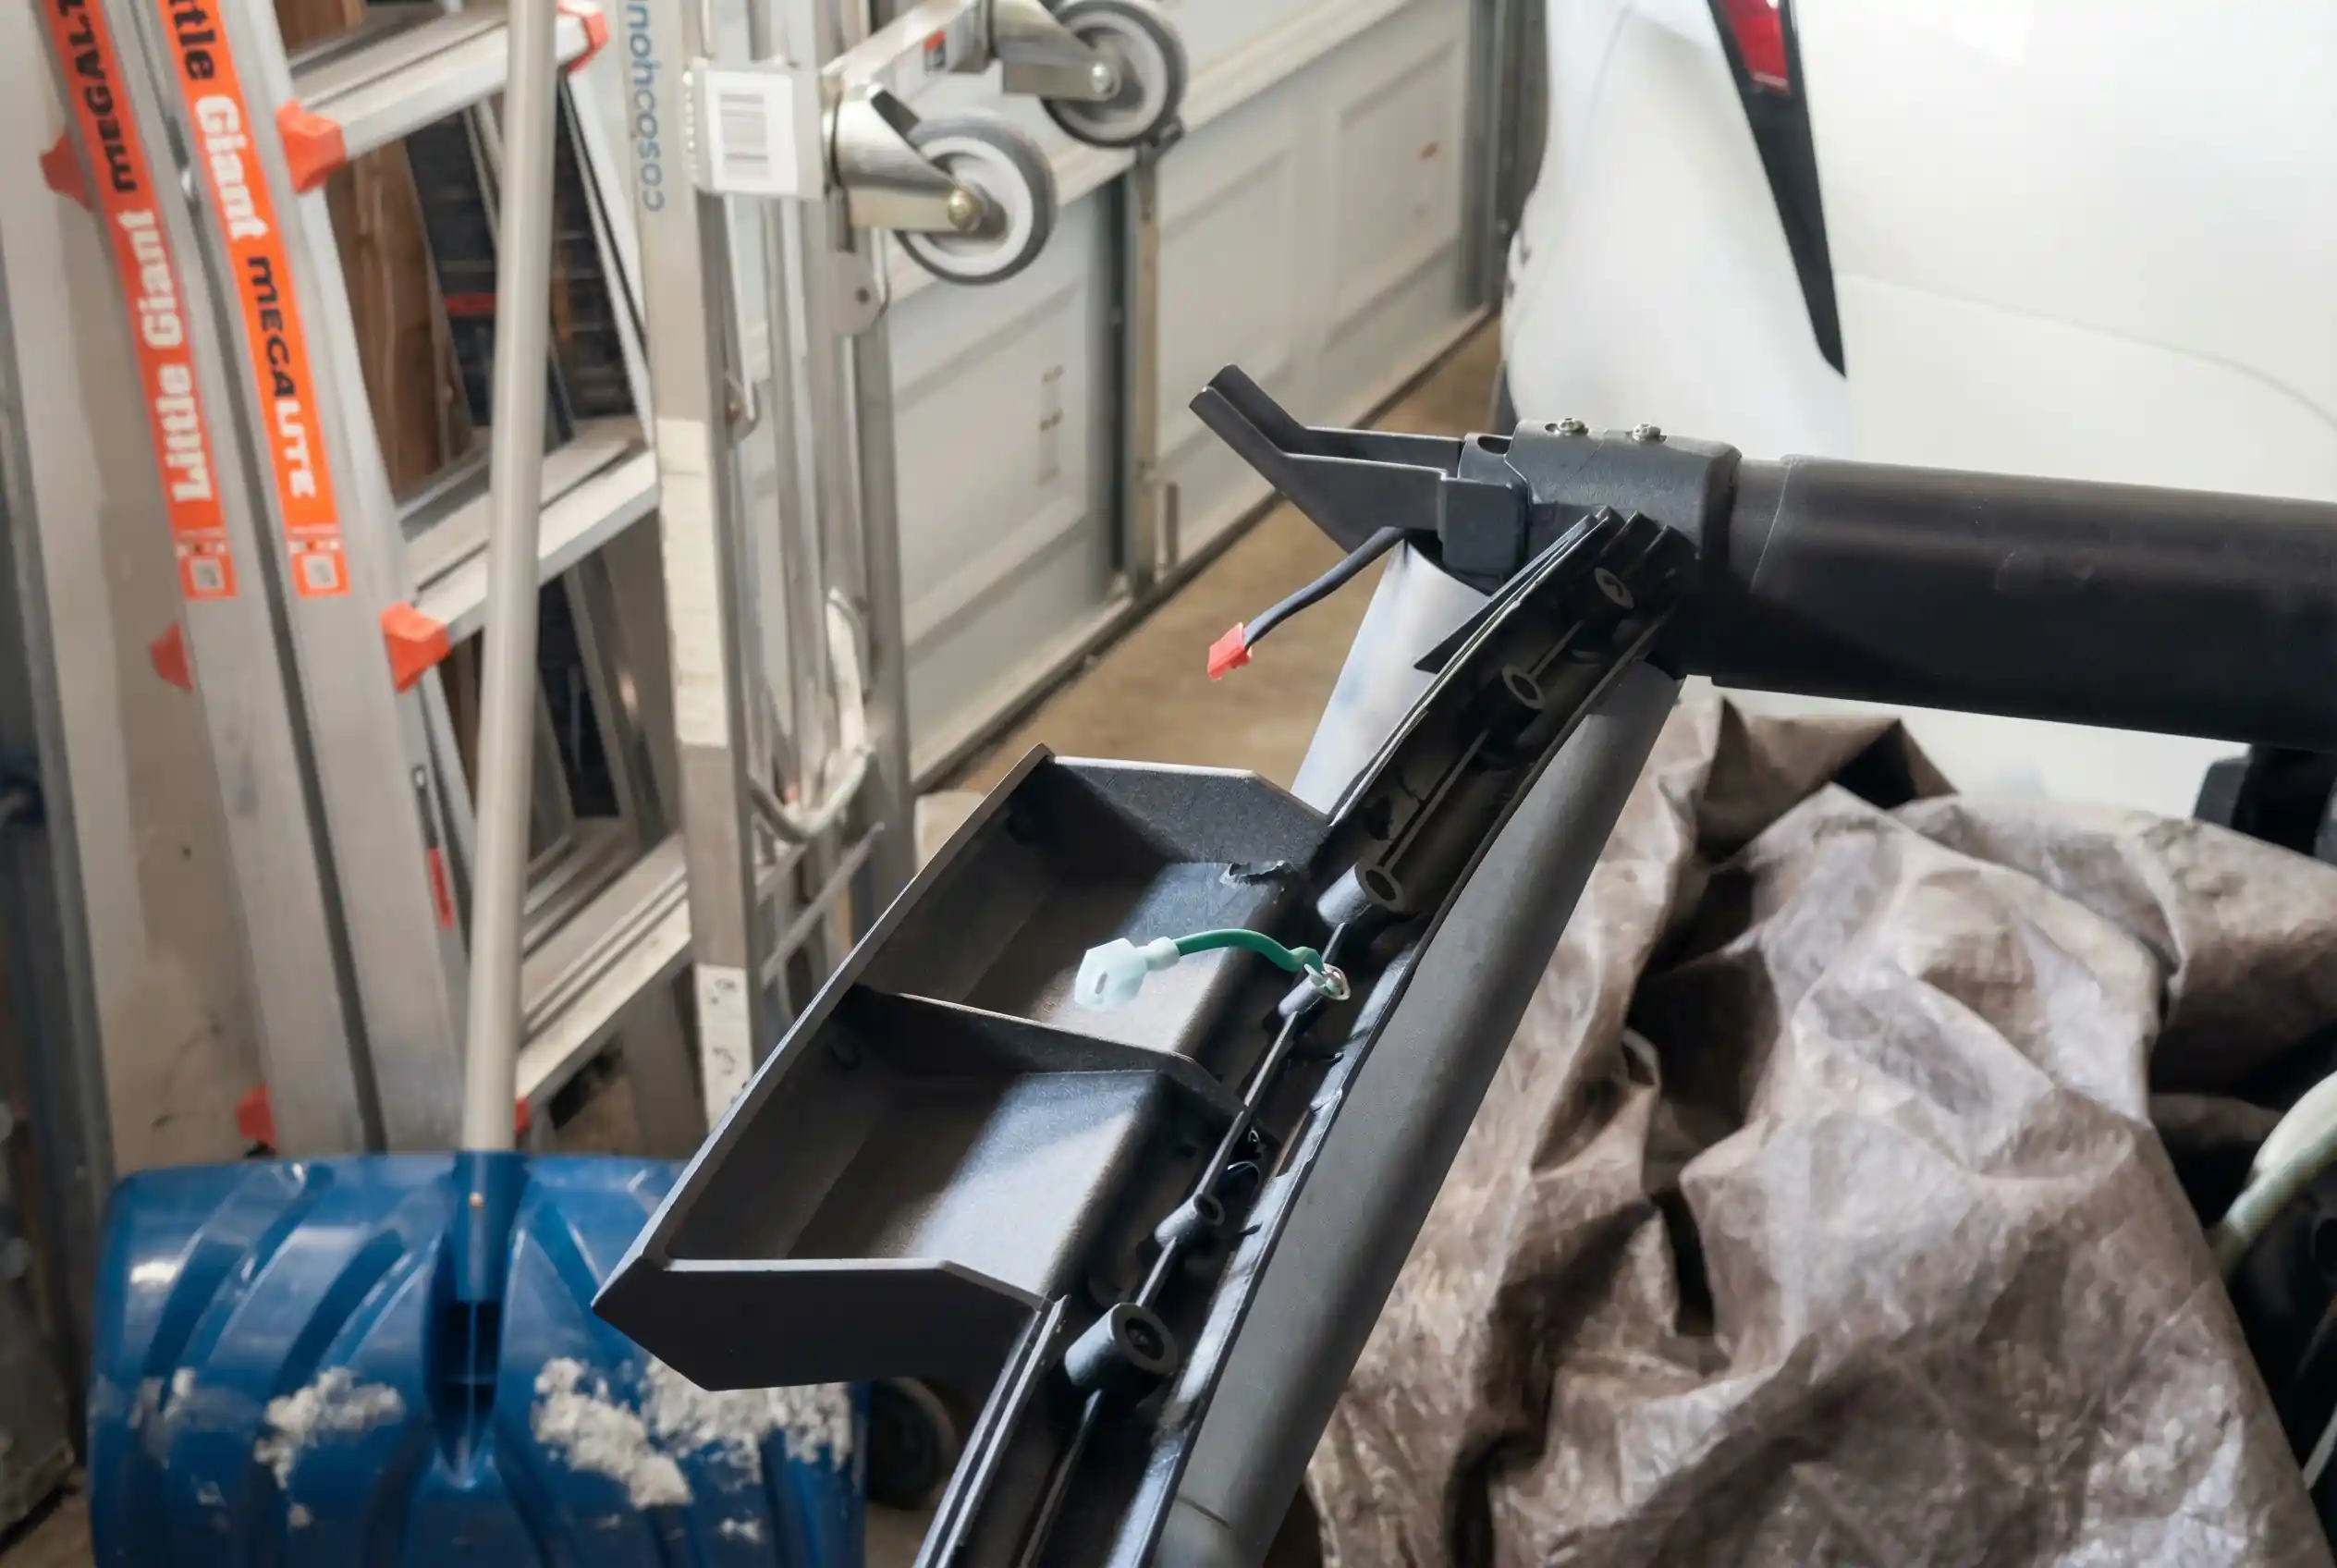
One particularly costly mistake involves stripping bolt heads by using the wrong size wrench or applying force at the wrong angle. If a bolt seems stuck, stop and apply penetrating oil. Let it sit for 10-15 minutes before trying again. Forcing a stuck bolt almost always results in stripping the head, which then requires drilling out or other difficult extraction methods.
Another common error is inadequate protection during transport. I've seen people load unwrapped uprights into trucks, only to have them bang against other items and crack their plastic coverings. Even when moving within the same building, wrap components to prevent scratches and dents.
Reassembly Considerations: Planning for Treadmill Assembly After Moving
Thinking about reassembly during disassembly makes the process much smoother. Your organization system, photos, and labeled bags all contribute to efficient reassembly, but there are additional considerations.
Choose your reassembly location carefully before disassembling. Measure the space to ensure your treadmill will fit with adequate clearance on all sides. Most manufacturers recommend at least 3 feet behind the treadmill and 1-2 feet on each side for safe operation.
The floor surface matters significantly. Placing a treadmill on carpet can affect its stability and operation. If your new location has carpet, purchase a treadmill mat to provide a stable, level surface. These mats also protect your flooring from the treadmill's weight and vibration.
Electrical requirements should be confirmed before reassembly. Most treadmills require a dedicated 15 or 20-amp circuit. Using an extension cord with a treadmill is generally not recommended as it can cause voltage drops that damage the motor or electronics.
Plan your reassembly for a time when you're well-rested and have adequate help. Attempting reassembly when tired leads to mistakes and potential injury. The process typically takes 30-50% longer than disassembly, so budget your time accordingly.
Before fully reassembling, test the electronics if possible. After connecting the console and power, verify that it powers on and responds to input. This early check ensures you don't complete the entire reassembly only to discover a connection problem.
Once everything checks out and the belt is tracking properly, the machine is ready to use.
Pro Tip: Many treadmill issues after a move aren’t caused by wiring or electronics. They come from over-tightened or unevenly tightened bolts during reassembly.
When reinstalling bolts, tighten them snug, not maximally. Then do a second pass to ensure even tension across both sides of the frame. Over-tightening can strip threads, stress the frame, or create alignment issues that lead to belt drift or unusual noise during use.
When Professional Help Makes Sense: Evaluating Your Options
While this guide empowers you to disassemble your treadmill independently, certain situations warrant professional assistance. Recognizing these scenarios protects both you and your equipment.
Professional help makes sense when:
- You're dealing with stairs: Moving a treadmill up or down stairs exponentially increases injury risk and the potential for equipment damage. Professional movers have specialized equipment like stair dollies and the training to navigate these situations safely.
- The treadmill weighs over 400 pounds: Commercial-grade treadmills and high-end residential models often exceed weights that can be safely managed by even two strong people. Professional movers use teams of 3-4 people plus mechanical assistance for these machines.
- You have physical limitations: Be honest about your capabilities. If you have a history of back problems, recent injuries, or conditions that limit your strength, hiring professionals is a wise investment in your health.
- The equipment is under warranty: Some manufacturers require professional moving to maintain warranty coverage. Check your warranty documentation before proceeding with DIY disassembly.
- You lack the necessary tools: Purchasing all required tools for a one-time disassembly might cost as much as hiring professionals. Factor in tool costs when making your decision.
- Time constraints are severe: Professional movers typically complete a treadmill move in 2-5 hours total, including disassembly, transport, and reassembly. If you're on a tight schedule, the time savings justify the cost.
Professional treadmill moving services range from $70 for basic local moves to $500+ for complex jobs involving stairs, long distances, or heavy commercial equipment. Many movers offer free estimates, so you can compare the cost against the value of your time and the risk to your equipment.
Environmental Considerations: Disposing of Treadmill Components Responsibly
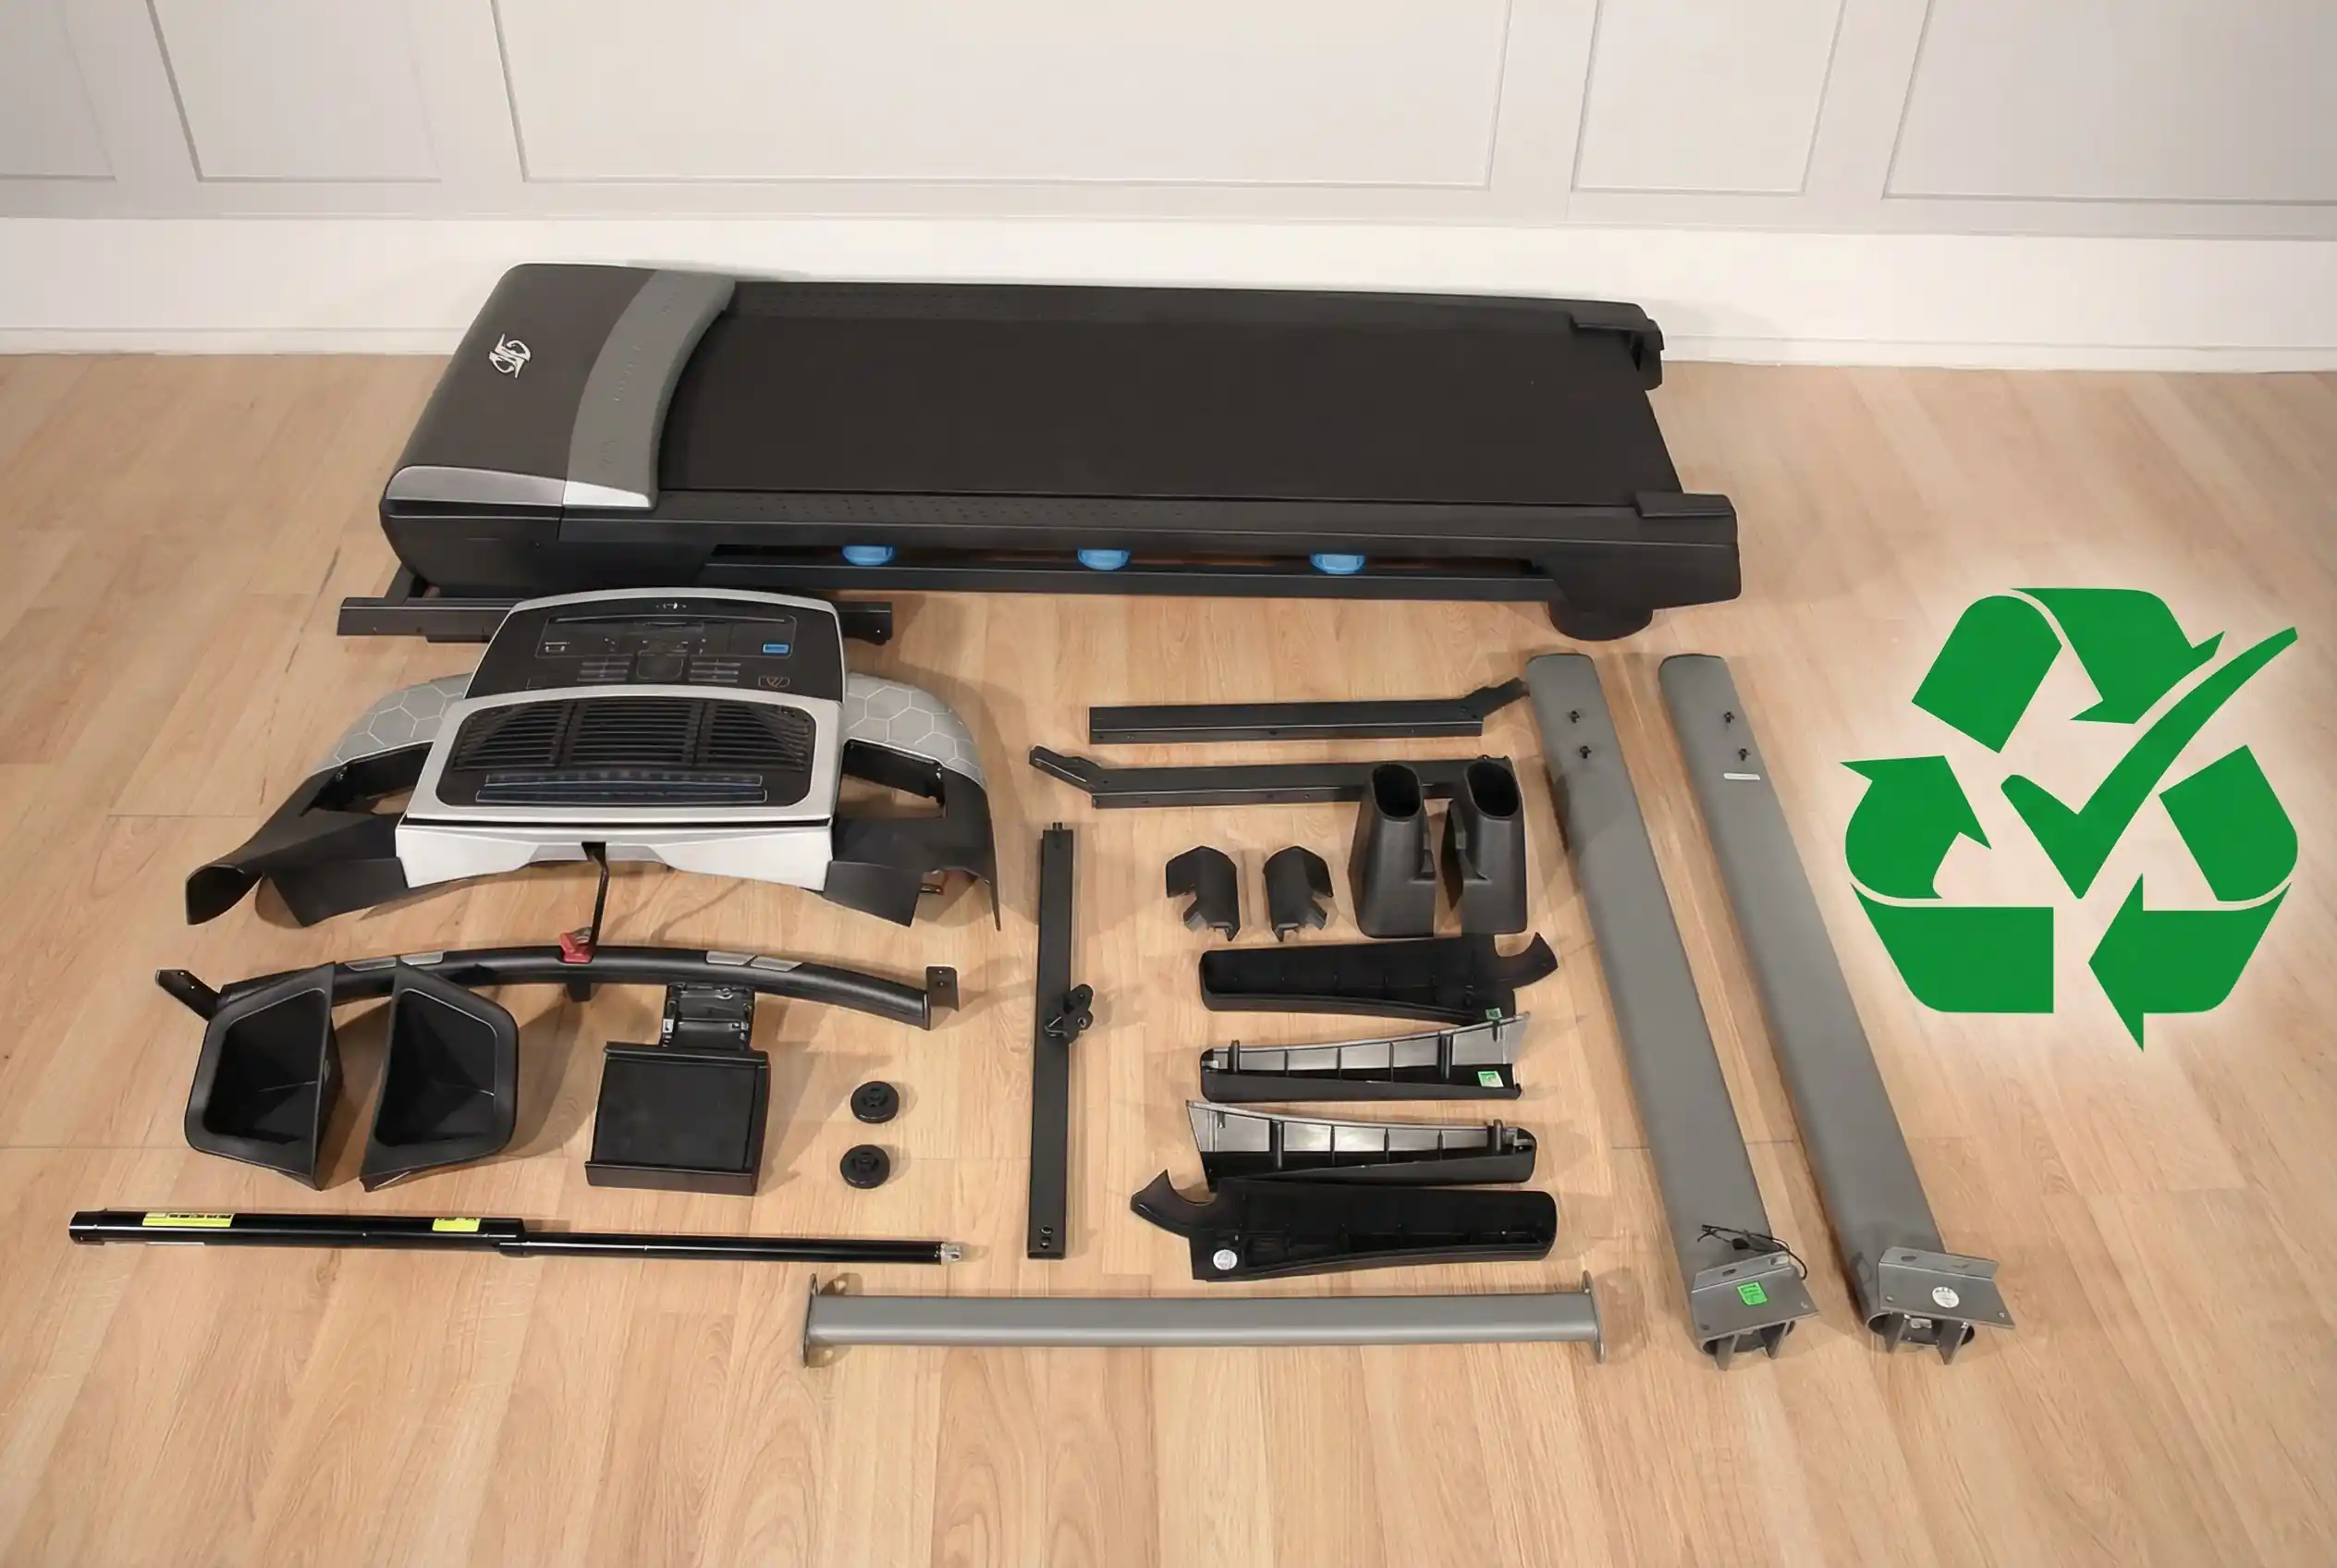
If you need to take apart a treadmill for disposal rather than moving it, environmental responsibility matters. Treadmills contain recyclable materials and components that shouldn't go to landfills.
- The motor contains copper wiring and steel components that recycling centers gladly accept. Many metal recyclers will pay for treadmill motors due to their copper content. Contact local scrap yards to inquire about drop-off or pickup services.
- Electronic components, including the console and control boards, contain hazardous materials that require special handling. E-waste recycling programs accept these items at no charge in most areas. Never dispose of electronics in regular trash.
- The belt and deck typically contain rubber, wood composite materials, and adhesives. While these aren't easily recyclable through standard programs, some specialty recyclers accept them. Check with your local waste management authority for appropriate disposal methods.
- The metal frame, handrails, and structural components have significant scrap value. Breaking down these parts and taking them to a metal recycling center often results in a small payment rather than disposal fees.
Moving Beyond Basics: The Treadmill Benefits of Regular Maintenance
Understanding how to properly disassemble and maintain your treadmill directly connects to maximizing its performance and longevity. Throughout my years testing fitness equipment, I've seen properly maintained treadmills last 15-20 years while neglected ones fail within 5.
Regular treadmill maintenance includes periodic partial disassembly for deep cleaning and component inspection. The skills you've learned for full disassembly apply directly to these maintenance tasks. Removing the motor cover quarterly lets you clean dust accumulation, check belt alignment, and apply lubricant as needed.
The treadmill benefits you experience, including improved cardiovascular health, convenient home workouts, and consistent training despite weather, depend on having a functioning machine. Proper disassembly techniques prevent damage that would interrupt these benefits.
When you understand your treadmill's internal components through the disassembly process, you're better equipped to diagnose problems early. That unusual noise you notice might be a loose belt rather than a failing motor, saving hundreds in repair costs through early intervention. And once the machine is back in action, it is worth adding some variety to your routine beyond standard forward walking. Research shows that walking backwards burns 40% more calories at identical speeds while reducing patellofemoral compression, which is a meaningful benefit for everyday users. Our guide to the benefits of walking backwards on treadmill in daily training has the full breakdown.
Getting Your Treadmill Ready for Its Next Chapter
It doesn’t matter if you're relocating to a new home, reorganizing your existing space, or simply performing deep maintenance because knowing how to disassemble a treadmill properly ensures your equipment arrives at its destination ready for years of continued service.
The techniques we've covered apply across treadmill brands and models, though specific details vary. Your NordicTrack, ProForm, Sole, Bowflex, or Peloton may have unique quirks, but the fundamental principles remain consistent: work methodically, document everything, organize components carefully, and prioritize safety above speed.
As you continue your fitness journey, whether with this same treadmill reassembled in a new location or with upgraded equipment down the road, these skills remain valuable. The attention to detail, organizational habits, and safety-conscious approach transfer to any equipment handling situation. And if you ever want a science-backed reminder of what all this effort is actually in service of, our treadmill benefits for daily fitness covers 17 peer-reviewed benefits spanning cardiovascular health, fat loss, mental wellbeing, and joint protection, which makes a compelling case for why keeping this machine running is worth the effort.
For future upgrades, compare current treadmill options by folded footprint, console size, and transport wheels, because those features decide how hard the machine will be to move later.
FAQs
Can you take apart a treadmill to move it?
Yes, you can take apart a treadmill to move it, and disassembly is actually recommended for safe transport. Most residential treadmills break down into 3-5 major components, including console, uprights, motor assembly, and base, which reduces the weight per piece and makes navigating doorways and stairs much more manageable.
Is it easy to disassemble a treadmill?
Disassembling a treadmill is moderately easy if you have basic DIY skills and the right tools, like hex wrenches and screwdrivers. For someone with moderate experience, basic disassembly typically takes 60-90 minutes and requires careful attention to documenting wire connections and organizing hardware.
Can a NordicTrack treadmill be disassembled?
Yes, a NordicTrack treadmill can usually be disassembled by removing the console, disconnecting the console wiring, and unbolting the uprights from the base. On the Commercial 1750 the manual shows upright and fan wire connections, and for a typical move you keep the base, deck, and motor together unless your model's manual says otherwise.
How do you move a heavy treadmill?
To move a heavy treadmill safely, you need to recruit at least one helper and use a furniture dolly rated for 400+ pounds. Disassemble the treadmill into lighter components, lift with your legs rather than your back, and consider hiring professionals for stairs since injury risk increases significantly.
How much does it cost to move a treadmill?
The cost to move a treadmill ranges from $70 to $500, depending on distance, stairs, and equipment weight. Basic local moves cost $70-$150, while moves involving stairs or long distances run $200-$500, though DIY moves only cost $25-$50 in supplies if you're willing to handle it yourself.
References:
- Wurzelbacher SJ, Lampl MP, Bertke SJ, Tseng CY. The effectiveness of ergonomic interventions in material handling operations. Appl Ergon. 2020;88:103161. Published 2020 May 11. doi:10.1016/j.apergo.2020.103139
- Jari A, Niazmand-Aghdam N, Mazhin SA, Poursadeghiyan P, Sahlabadi AS. Effectiveness of training program in manual material handling: A health promotion approach. J Educ Health Promot 2022 Mar 23:11:81. doi: 10.4103/jehp.jehp_492_21.
- Pizatella TJ, Putz-Anderson V, Bobick TG, McGlothlin JD, Waters TR. Understanding and evaluating manual handling injuries: NIOSH research studies. Ergonomics. 1992;35(9):945-953. doi:10.1080/00140139208967374
- McAtamney L, Corlett EN. Ergonomic workplace assessment in a health care context. Ergonomics. 1992;35(9):965-978. doi:10.1080/00140139208967376